The Winton Rotovator is ideal for cultivating land ready for planting. It needs to be in good working order to function at its best, so maintaining the machine is key. During maintenance, make sure the tractor is stationary and the keys are out of the ignition.
Attaching the Machine
- Start by finding a flat piece of ground. Lower the 3-point linkage on your tractor to its lowest position and attach the rotovator to the tractor using the linkage pins and linch pins.
- Adjust the top linkage arm on the tractor to line-up with the rotovator, attach using the top link pin and linch pin.
- Adjust the length of the top linkage arm until the rotovator’s PTO output is parallel to the ground.
- Start the tractor engine and lift the rotovator from the ground.
- Switch off the tractor engine and remove the ignition key.
- Level the rotovator so both sides are parallel to the ground by adjusting the tractor’s lifting arms. The blades must be at equal distance from the ground on both sides of the rotovator.
- Adjust the tractor lower link arm to prevent excessive movement to the side (we recommend a movement of 5cm each side).
- Attach the PTO driveline and check it correctly meshes at both ends. If a shear bolt or slip clutch safety system is used on the PTO shaft, this must be mounted on the rotovator end. Check the PTO driveline is the correct length. The minimum overlap must be 18cm when working, and the driveline must be able to travel at least 2.5cm. Always couple the two ends of the driveline and check they are locked in place. Completely insert the sprung lock pins into the grooves in the PTO shaft on both the tractor and rotovator sides. Check and apply grease if required to grease points on PTO shaft.
- Attach the PTO drive shaft, secure locking pin, and ensure chain is attached to a secure point. Operate the flail mower the with tractor in low range gear and the PTO delivering 540 RPM.
Blade Replacement
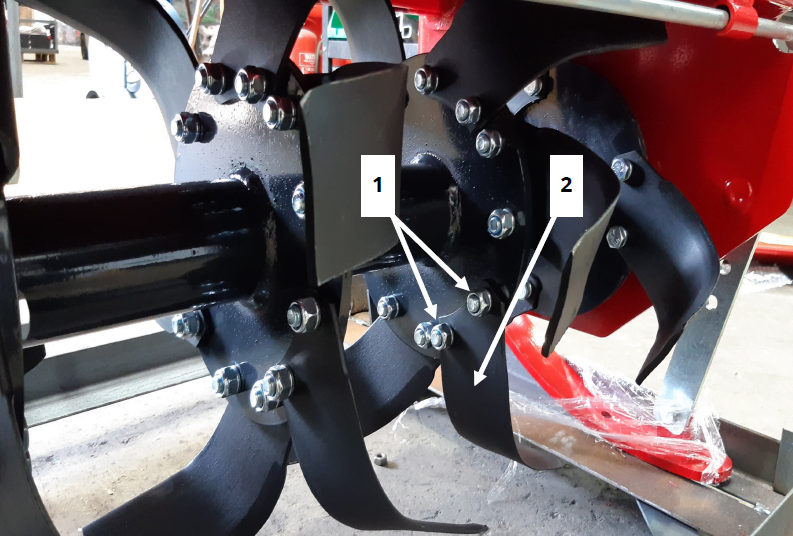
Lift the machine to access the blades and rotor. Use rigid supports and ensure the rotovator is stable. Replace any damaged/worn/blunt blades:
- Unscrew the 2x bolts and nuts (1) and remove the blade.
- Insert the replacement blade (2). Ensure the blades on the same blade mounting are bolted on alternate sides (left-handed to one side then right-handed to the other) as shown in the image.
- Replace bolts and nuts (1).
- Check all blade bolts are secured and blades are adjusted correctly.
- Run the rotovator for 5-10 minutes and re-check bolt tightness.
Gearbox Oil Check/Change
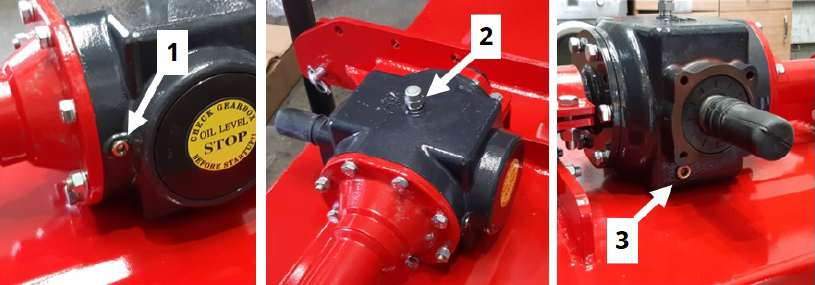
- Remove level plug (1) and breather/filler plug (2).
- The oil level should be up to the edge of level plug (1) approximately half full. If required, top up with oil (80w90 gear oil) using filler hole (2).
- Replace both plugs (1 & 2).
If draining and replacing oil, then remove drain plug (3) and let the oil drain out. Replace drain plug (3) then replace oil as above.
Gear Reservoir Oil Check/Change
Always check oil when the machine has cooled down and on a level surface. Make sure bolts are tightened correctly. The filler/level plug should be secure but not over tightened. Do not mix old and new oils together or mix different oil types. Always dispose of oils correctly and safely. After use, the attachment should be left to cool down for 15 minutes before checking oil levels. Ensure the gearbox is flat/level when checking oil levels. Always follow manufacturer’s instructions for oils and lubricants.
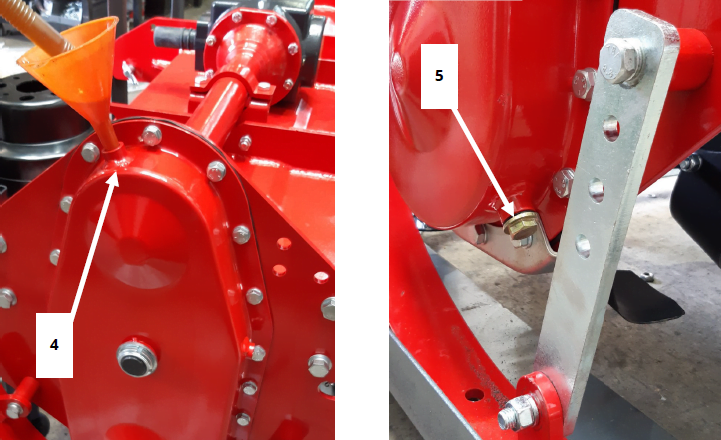
- Remove breather/filler plug (4) and drain plug (5) to allow the oil to drain from the reservoir.
- Replace and screw in drain plug (5), replace oil (SAE 140 gear oil) using a funnel through filler hole (4).
- Replace breather/filler plug (4)
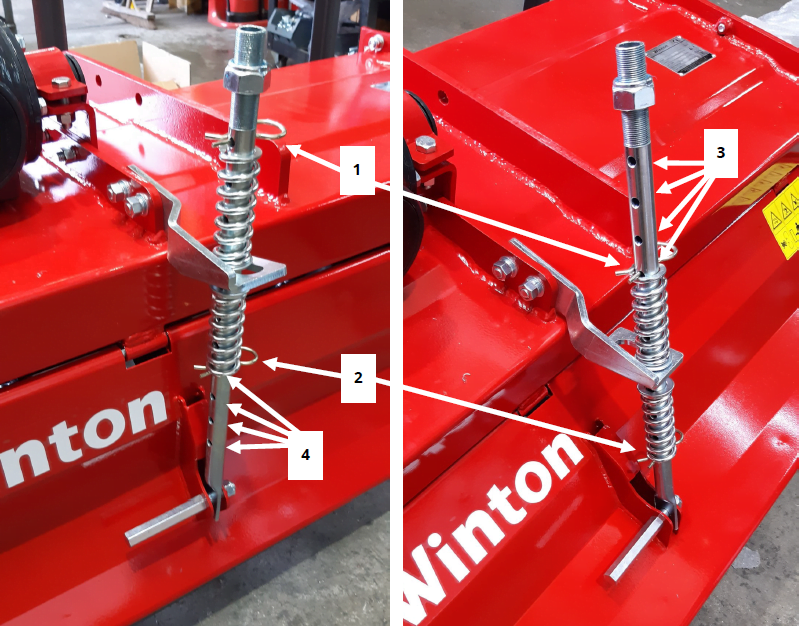
Rear Guard Adjustment
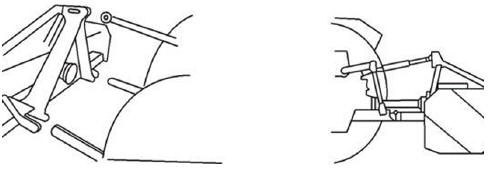
To determine how compacted the soil is after cultivating, adjust the rear guard using an adjustment rod. The rod is sprung so there is downwards force on the rear panel to aid compaction:
- Remove R clips (1 & 2).
- Move both R clip (1) up or down and insert into one of the holes (3).
- Move R clip (2) up or down the same number of holes into (4).
- Ensure the springs remain between the two R clips (1 & 2).
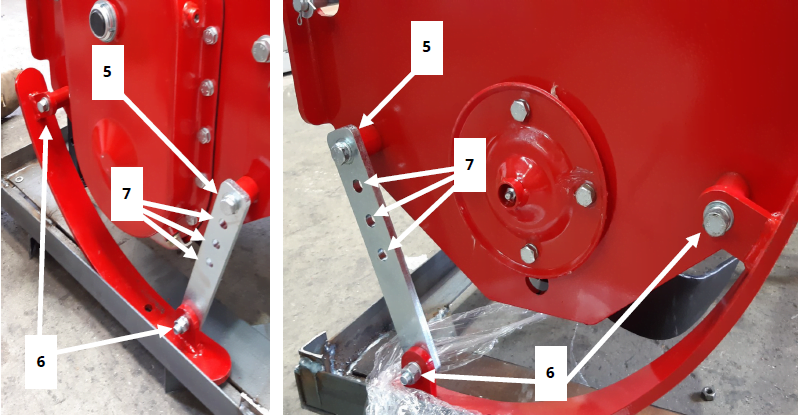
Tilling Depth Adjustment
We recommend a maximum working depth of 15cm for soft soil, and 13cm for dense/dry soils. The initial set up of the tractor’s top linkage arm and the linkage set up will influence tilling. But it is also important to set up the side skids to get the correct depth when cultivating. Moving the skids down and further away from the body will create a shallower working depth. Moving the skids upwards closer to the machine will increase the working depth achieved:
- Remove bolt (5) and loosen off bolts (6).
- Replace bolt (5) into the selected hole (7) and tighten.
- Re-tighten bolts (6) in position.
- Repeat steps (1-3) above on the other side of the machine.