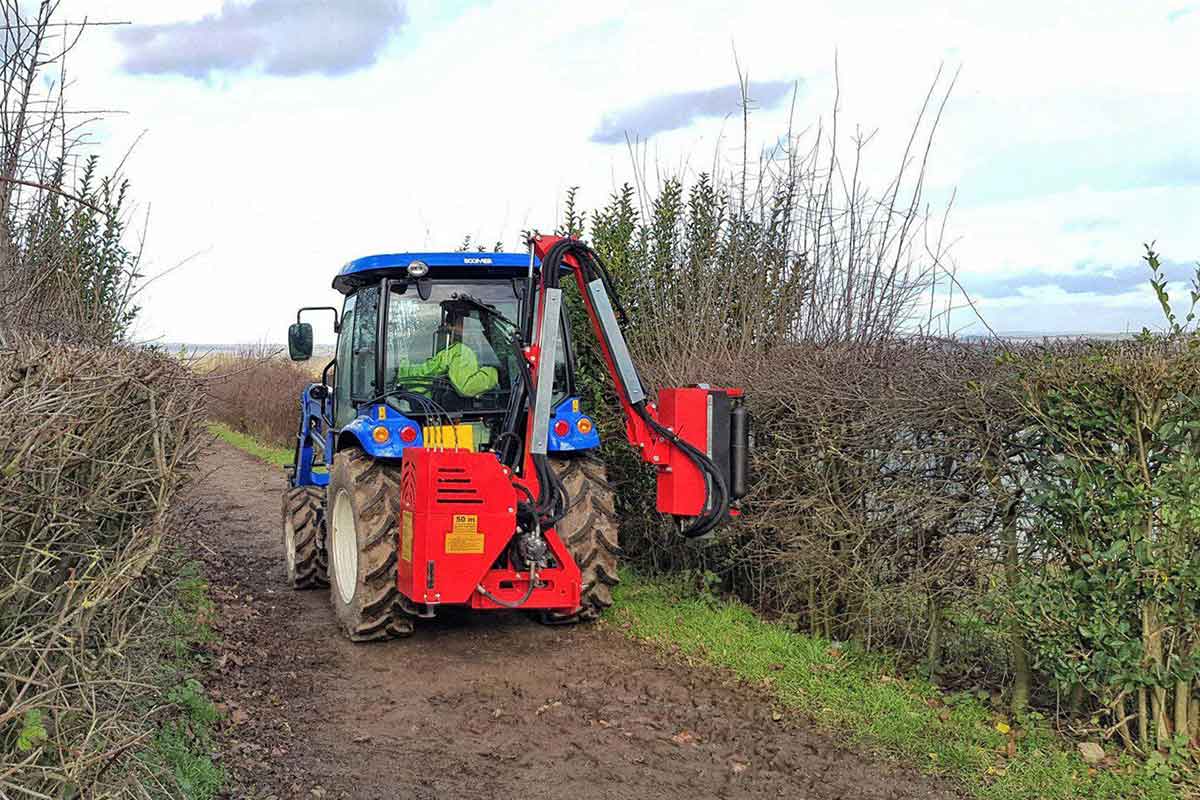
The Winton Hedge Cutter uses Y-blades in a spiral formation on the rotor shaft, much like a flail mower. Its movement is controlled through a panel of levers that attaches to the tractor, and is powered through the hydraulics of the tractor. With so many moving parts, it is important to keep the WAM in good working order. However, before attempting any repairs, adjustments or maintenance, please make sure both machine and tractor are stationary, and the keys are out of the ignition.
Attaching to the Tractor
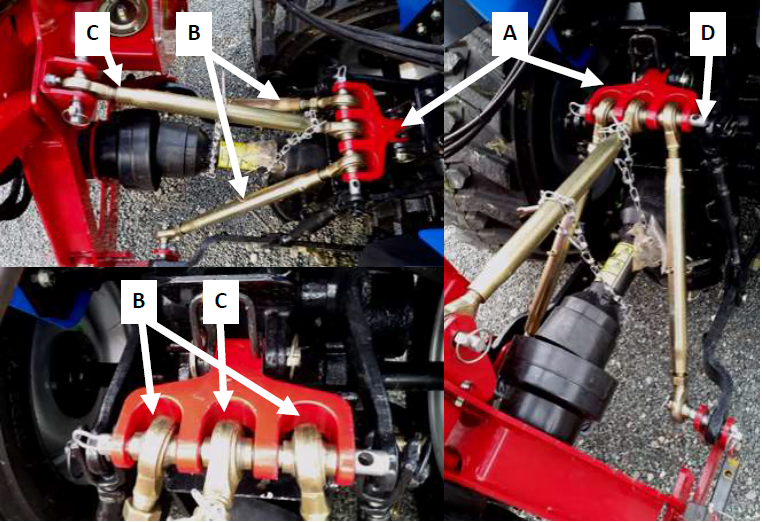
On a flat area of ground with good access, lower the 3-point linkage on your tractor in line with the machine linkage and then follow these steps:
- Attach tractor lower link arms to the frame using the lower link pins.
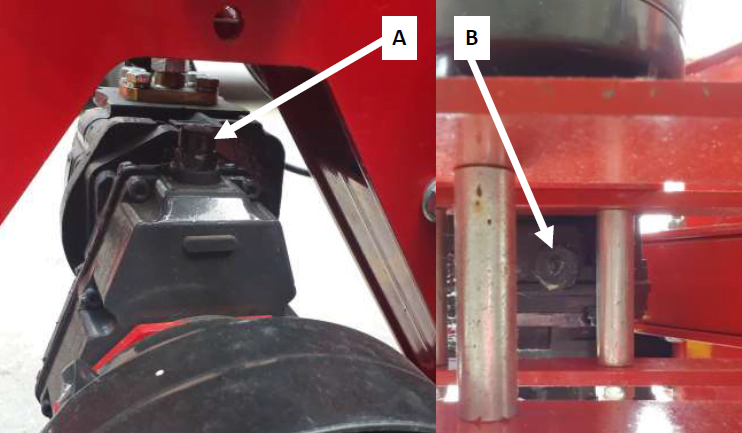
- Fit the top linkage point bracket (A) to your tractor.
- Attach the 3 top link arms (B & C) to the top bracket (A) using the top link pin (D).
- Secure the arms (B) to both sides of the machine’s lower link points using the inside of the pins and extend so (A) is horizontal.
- Ensure tractor lower link chains are tight to stop the unit swinging sideways.
- Fit arm (C) to the top link point on the machine using the top link pin.
- Attach the lever control panel.
- Adjust the length of arms (B & C) so the body and A-frame of the machine is vertical.
- Attach PTO shaft to tractor and machine, then secure the chains to a fixed point as shown so the guard cannot spin.
- Lift the unit using the tractor linkage and raise the stabiliser legs (E) securing with the pin.

Detaching from the Tractor
Position safely as described for attaching to the tractor and then follow these steps:
- Close the angle of the cutting head using the hydraulic lever.
- Then use the lever to bring the cutting arm back towards the machine.
- Lower and secure the stabiliser legs (E) to the machine using the pins.
- Lower the machine to the floor and ensure it is stable, if not then stabilise the unit.
- Turn off the tractor and ensure PTO drive shaft is stopped.
- Remove the chains from the PTO and remove the PTO shaft from tractor and machine.
- Disconnect the top link (A) and bottom link arms.
- Remove the hedge cutter controls from their mount on the tractor.
- Start the tractor and slowly drive off from the position, checking all connections are free.

Adjusting the Cutting Height
The cutting height should be adjusted for any ground level cutting. This should be set to suit the land and also the length of grass or density of weeds. The cutting height can be set for longer grass or overgrown areas by adjusting the roller on the machine:
- Loosen bolt (2) and remove bolt (1) on both sides of the machine.
- Adjust roller by aligning the selected hole in the roller support bracket at position (1) (using the hole closest to the ground gives the highest working height).
- Put bolt (1) into the selected hole and re-tighten bolts (1 & 2).
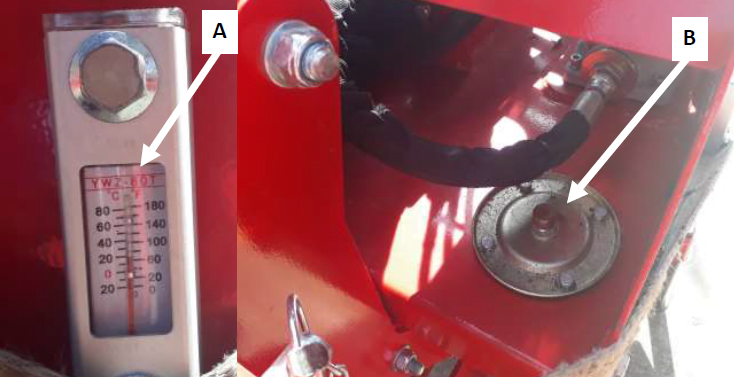
Hydraulic Oil Level Check
Check oil level when the unit is cold and the machine is level. Ensure different types of oils are not mixed in the machine, this also applies to old and new oil. The hydraulic oil (Type 32) should be visible in the level indicator/thermometer on the side of the oil tank (A). This also shows the current temperature. If the oil level is below the level indicator then the hydraulic oil in the oil tank should be topped up:
- Unscrew and remove filler plug (B).
- Pour in the oil (a funnel or pipe is helpful here as it is a narrow filler).
- Fill until the oil can be seen in the level indicator (A).
- Replace the filler plug (B).
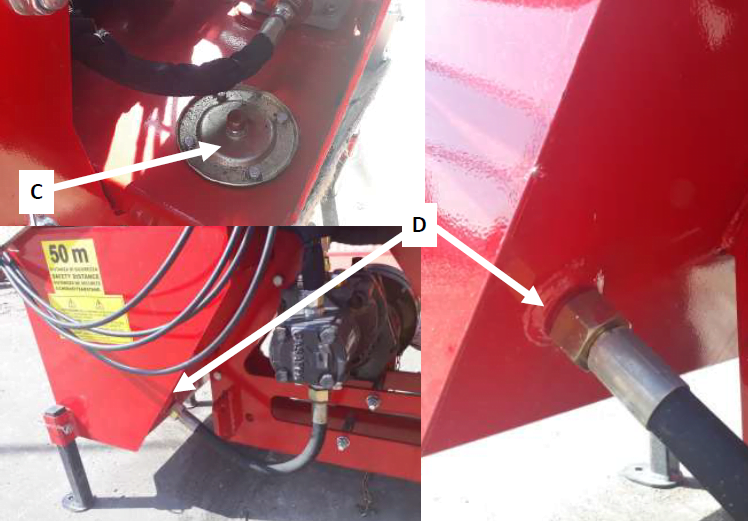
Changing Hydraulic Oil
Ensure that the machine has not been running before changing the oil. If it has then wait until the unit is completely cooled down before changing oil:
- Remove the filler plug on the top of the oil tank (C).
- Then either use an oil pump to remove the oil or, if not available, unbolt the lower pipe from the oil tank (D).
- Drain the oil.
- Then replace fixing/pipe (D) ensuring this is secure.
- Fill with hydraulic oil through filler (C) until the oil is visible through the level indicator (A).
- Replace filler plug (C).
Gear Oil Level Check
Check the oil (80w90 gear oil) level when the unit is cold and the machine is level. The oil level should be checked periodically to ensure the machine is working optimally. Ensure different types of oils are not mixed in the machine, this also applies to old and new oil.
- Unscrew and remove filler plug (A).
- Use a dipstick or similar to check oil level, this should be approx. half full.
- Top up the oil through filler (A) if needed to the required level.
- Replace filler plug (A).
Changing Gear Oil
When changing oil ensure that the unit and oil is cold. Gear oil (80w90) should be changed as per the schedule to ensure the machine is working optimally. Ensure different types of oils or old and new oil is not mixed when carrying our maintenance.
- Unscrew and remove filler plug (A).
- Place a tray under the gear box to catch the old oil.
- Unscrew and remove drain plug (B) (underneath the gear box).
- This will drain the oil from the gearbox.
- Replace drain plug (B).
- Fill the oil through filler (A) (approx. 200ml).
- Check oil level using a dipstick or similar, this should be approx. half full.
- Replace filler plug (A).
Always make sure to dispose of old oils in the correct manner. Check the oil manufacturer’s instructions for correct disposal methods.