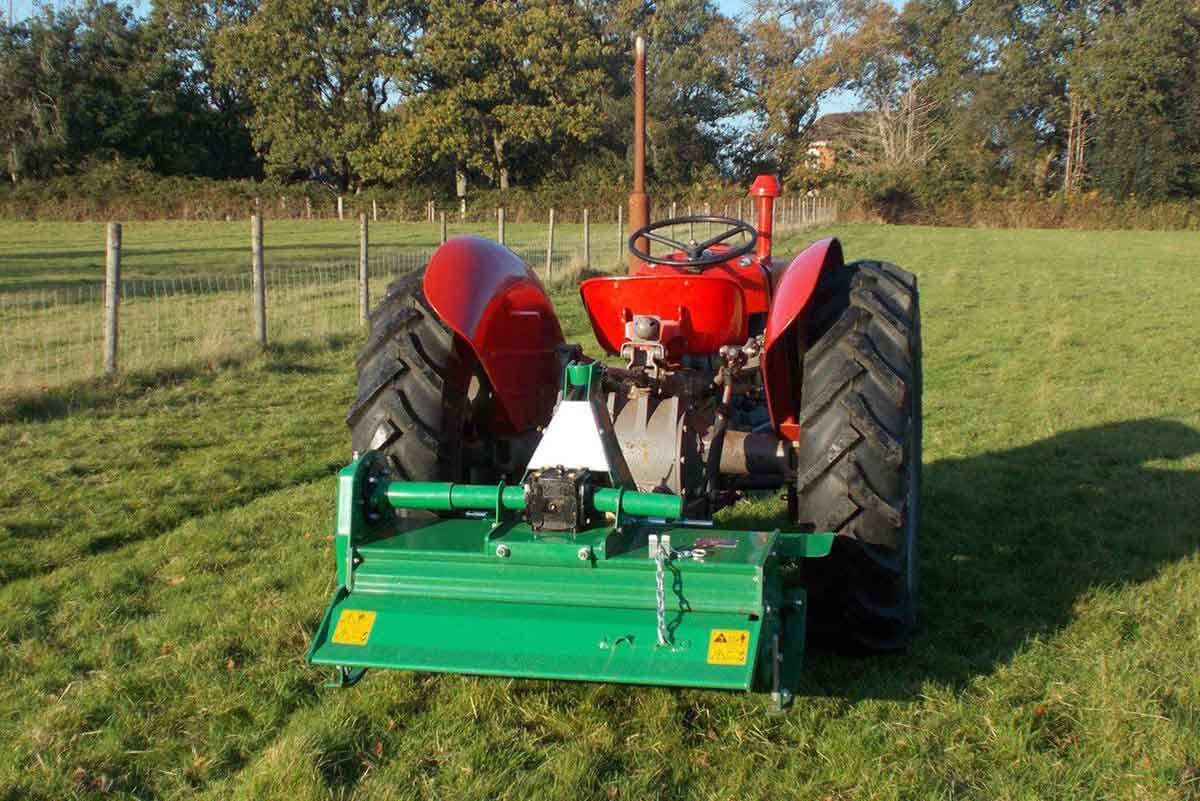
The FTS Rotovator while compact, is heavy-duty so it can power through most soils. However, to achieve the best results it is essential to install and maintain the machine properly. In order to be safe while doing so, the tractor and machine should be stationary and the keys out of the ignition.
Installation
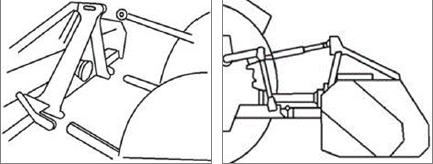
- On even ground, lower the 3-point linkage of the tractor to its lowest position. Attach the attachment to the tractor using the 3-point linkage pins and linch pins.
- Adjust the length of the top link arm so that the attachment is level with the ground.
- Check the clearance between the attachment skids and the blades for the tilling depth.
- Raise the tilling depth for drier soil or heavier soil types. To do this, raise the tractor’s hydraulic lift arms and adjust the skids on the attachment to increase the blade tilling depth. A lower pass can be made when the top layer of soil is broken up.
- The working speed of the attachment should be at a walking pace. Heavier soil should be cultivated at a slower pace for the best finish and to avoid any damage to the attachment.
- Lubricate all grease points including on the PTO drive shaft. Attach the PTO drive shaft and ensure locking pin is secure on both the tractor and attachment sides. Attach the chain to a secure point on the tractor/ attachment.
- Ensure all safety guards are in place. Always replace worn or damaged PTO drive shafts. Operate the attachment with tractor in a low gear range, keep the PTO output from the tractor at 540 rpm.
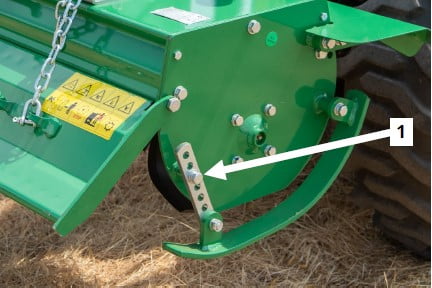
Set Working Depth
Ensure the attachment is raised slightly off the ground, but stable and secure when adjusting the skids.
- Loosen and remove bolt and nut (1) on the skids on both sides of the attachment.
- Move the skids up or down to the desired height.
- Align the hole on the body with the silver adjuster hole.
- Re-insert and tighten bolt and nut (1).
Gearbox Maintenance
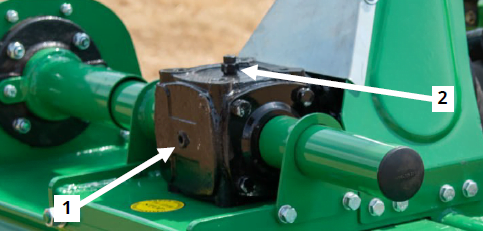
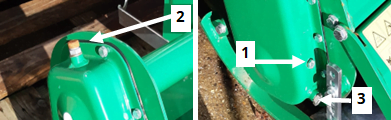
Check oil level when the unit is cold and the machine is level. Avoid over-filling as this may cause excess pressure and oil leaks. The oil (Grade 80w90 gear oil) should be changed every 250 hours of use or yearly (whichever is first). To do so you will need to remove the level plug (1) and filler/breather plug (2). The oil level should reach level plug (1). Top-up the oil through the filler plug (2) if required. Replace and tighten both plugs, but do not over tighten filler plug (2) as this may cause a pressure build-up in the gearbox.
Chain Oil Level
Check oil level when the unit is cold and the machine is level. The oil (SAE 140 gear oil) should be enough to just submerge the chain within the chain guard. Avoid over-filling as this may cause excess pressure and oil leaks. Remove the level plug from the lower side of the chain guard (1). Remove the filler/breather on top of the chain guard section (2). The oil level should reach the level plug (1). Top-up the oil through (2) if required. Replace and tighten both plugs, but avoid over-tightening the filler plug. Remove drain plug (3) when draining or replacing oil.