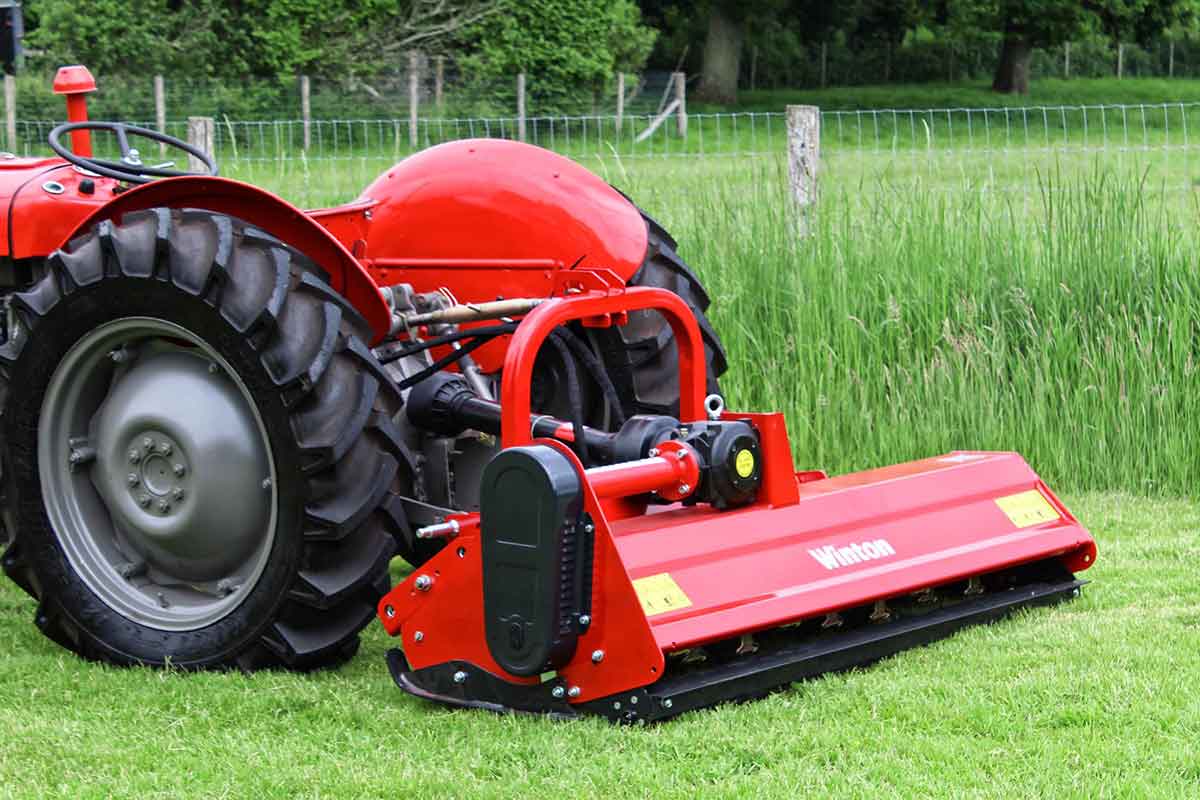
The Winton Side-Shift Flail Mower can be hydraulically positioned to reach even the most awkward areas. So many moving parts require careful maintenance. This should always be completed when both the tractor and machine are stationary.
Attaching to the Tractor
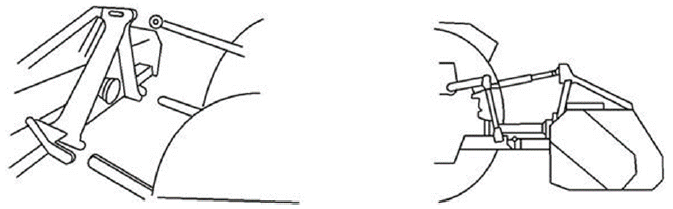
- Start by finding a flat piece of ground. Lower the 3-point linkage on your tractor to its lowest position and attach the mower to the tractor using the three point linkage pins and linch pins.
- Attach the hydraulic connections.
- With the rear roller on the mower on the ground, adjust the length of the top link arm and use the tractor hydraulics to ensure the skids at the side of the flail mower are parallel with the ground when horizontal.
- Rotate the blade rotor by hand so that a row of blades hang vertically towards the ground to give an idea of the cutting height. Check the clearance between the bottom of the blades and the ground, this should be at least 30mm.
- Check your PTO shaft’s grease points and apply grease if needed. Then attach the PTO drive shaft and ensure the locking pin is secure on both the tractor and mower sides. Attach the chain to a secure point on the tractor/implement.
The working speed of the machine should always be at a walking pace (approx. 2 to 5 mph) depending on the working conditions. Overgrown grass and weeds should be cut at a much slower pace for the best cut and to avoid any damage to the mower. Operate the flail mower the with tractor in low range gear and the PTO delivering 540 RPM.
Adjusting Cutting Height
Getting the cutting height right is the key to creating the best cut and finish when mowing. This needs to be adjusted depending on the lay of the land as well as the length of grass and density of weeds. The cutting height can be set for longer grass by simply raising the hydraulic lift arms on your tractor or/and by adjusting the rear roller and skids on the machine.
Roller Adjustment
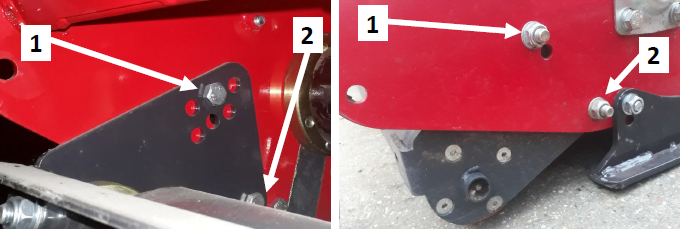
- Remove bolt (1) on both sides of the machine.
- Adjust roller by aligning the selected hole in the roller support bracket at position (1) (using the hole closest to the ground gives the highest working height).
- Put bolt (1) into the selected hole and re-tighten bolt (1).
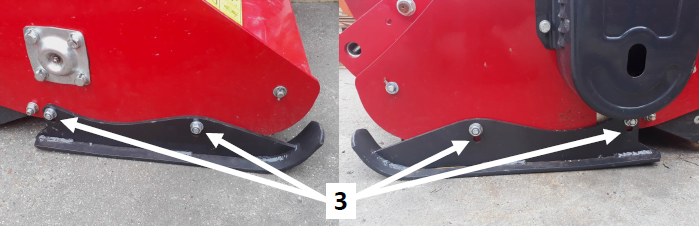
Skid Adjustment
- Remove bolts and nuts (3) on the front & back of both sides of the machine.
- Move the skids up or down to the desired bolt hole height.
- Re-insert bolts and nuts (3).
Oil Change/Check Gearbox
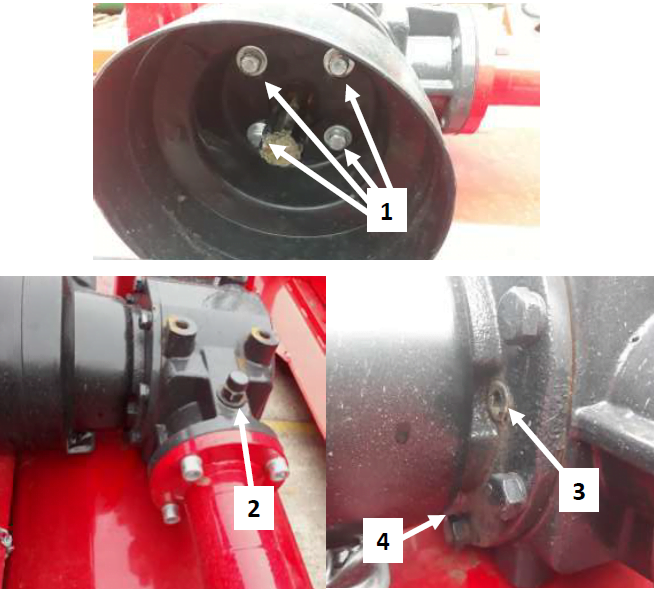
- Remove the PTO guard on the gearbox for best access, do so by removing bolts (1).
- Remove filler/breather plug (2) and level plug (3).
- Add oil through the filler/breather plug hole (2) until it reaches/begins to weep from the level plug hole (3).
- Re-install both plugs (2 & 3) and reattach the PTO guard.
The plug (4) underneath the gearbox PTO guard can be used when draining oil or alternatively use an oil pump. Always make sure bolts are tightened correctly. The filler/level plug should be secure but not over tightened.
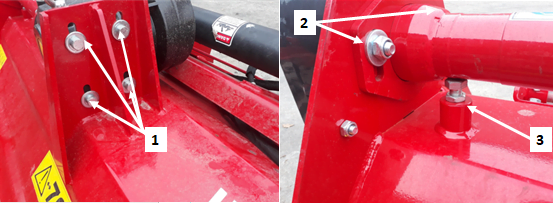
Adjusting Belt Tension
The correct belt tension is achieved when the belt can be deflected by the belt thickness about 10mm at the centre point between the pulleys. Tension should be checked regularly. As a general rule across machines, the belt should be able to twist a quarter turn by hand. Any more means they are too loose and any less they too tight. In this situation, you may run the risk of losing drive to the mower or burning the belts out prematurely.
- Remove the belt cover (4).
- Loosen the four bolts (1) securing the gear box to the mounting plate.
- Loosen bolts (2) on the back of the belt guard housing, holding the support shaft.
- Loosen off the counter locking nut (3).
- Adjust belt tension by adjusting the height of counter nut (3).
- Align the gearbox ensuring the drive shaft is parallel with the body and re-tighten nuts.
- Re-tighten all bolts.
- Replace the belt cover.
Ensure that the locking nuts are tightened to prevent the bolts working loose. Always use a straight edge to make sure the belt pulleys are in line and running true. If misaligned, call your dealer or service engineer for technical support.